
Recently, I have been giving one-on-one instruction in Photoshop and Photoshop Elements. I like doing the individual lessons as it allows people to learn exactly what they want to and go on from there. Photoshop is such a vast program that sometimes it is easier to start with a specific goal in mind.
The student I had last week is actually a friend as well as a member of the Creativity Group that I belong to and wrote about last week. She was the inspiration for me to originally play with Mandalas. She was always showing us her notebook where she would draw a mandala each day. Ever since I figured out how to do them in Photoshop , she has wanted to be able to create them digitally also. She bought Photoshop Elements for the express purpose of learning to make mandalas.
We had a couple of lessons where we went over some very basic computer/photoshop stuff but before she came last week I decided it was time to just dive in and have her create a mandala. There are a couple of different methods that I use, one uses pie shaped wedges taken from the source image and another uses a square section of the source image. They each yield very different results. Early on, I focused more on the Wedge technique because of the kinds of images I was using, mostly trees, and what I had in mind for the result. It’s quite similar to making a kaleidoscope. I hadn’t played with the square version in quite a while (I call it Twist and Flip as that is what you do with the multiple squares and layers that you create with the source image). When I thought about which method would be the easiest to understand and to implement quickly with a limited knowledge of Photoshop, the Twist and Flip method was the choice. In learning how to do that, she would learn about 3 or 4 different tools, learn about layers and blending modes, and get a basic understanding of how Photoshop Elements works. Way more fun than simply going over the tools and menus one by one! Within an hour she had created a beautiful mandala and understood the possibilities for variations. On her own, over the next week, she created several more and was learning what types of images yielded the best mandalas for her. I can’t wait for her next lesson!
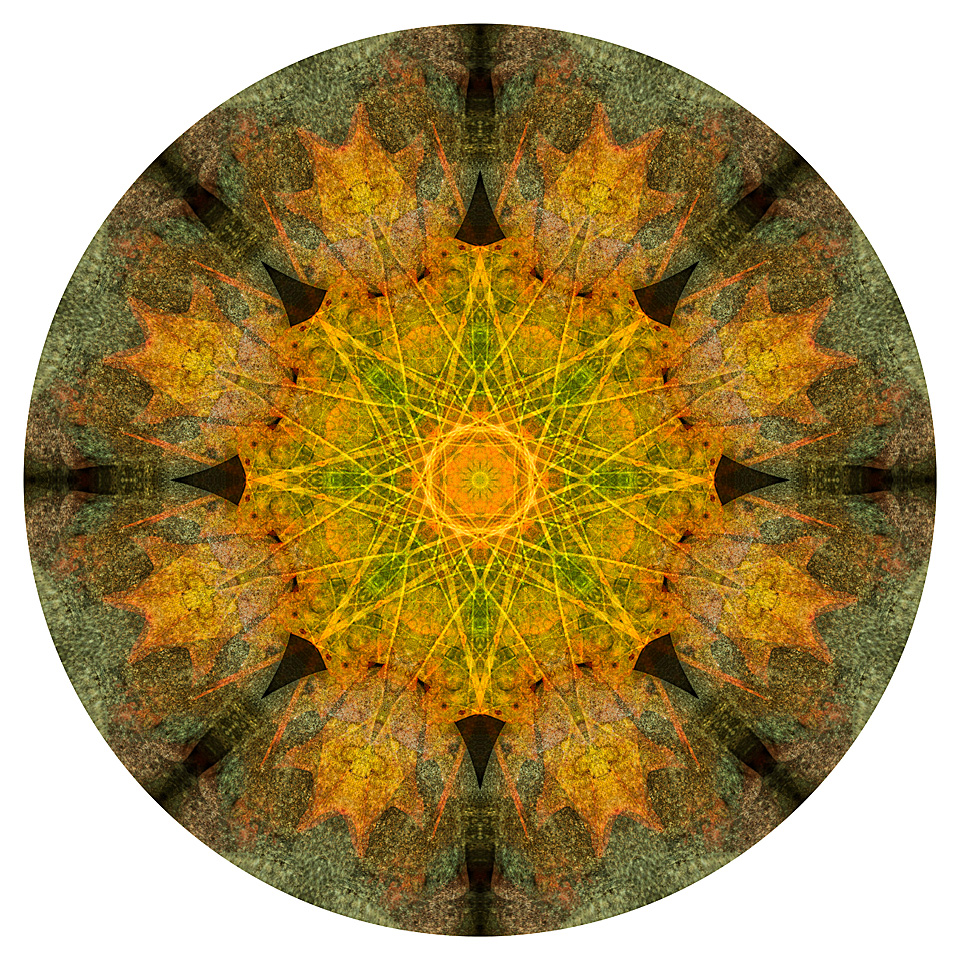
As a result of getting ready for her lesson I rediscovered this method that I had neglected for quite some time. I’ve been having so much fun playing with it again and discovering what sorts of mandalas result from various types of images. With both the Wedge and the Twist and Flip method though, there is only so much you can predict or anticipate with regards to the resulting mandala. That is much of what I love about creating them, that sense of wonder and surprise upon discovering something that was seemingly there all along but unseen.
One of the source images you may remember from the third Mandala Monday. Using the Twist and Flip method with this image yielded completely different mandalas than those from the previous post that were created with the Wedge method. In the gallery, every 2 mandalas are followed by the source image from which they were created.
I hope this Monday brings you welcome surprises like these mandalas did for me! Enjoy!
Gail, I am just amazed at the beauty and your talent in creating these mandala’s. They are just fascinating! Would love to learn how to do this at some point.
Beautiful! I love it. I don’t know much about photoshop, I can’t tell which one has squares or slices? They are beautiful! Thanks, Chandra
I love checking in to see your mandalas. I know you must have such a wonderful time creating them. My favorites this week are the two created from the leaf image. I love all things leafy!
just went back and saw these from last November. Spectacular!